Sunday, February 17, 2013

Companionway


The companionway will have three steps of 27cm. The two vertical side boards will give some privacy and protection to the navigation table and to the SB aft cabin.
This cabin will have no door. We ketpt it open. As this is a 2+2 boat, most of the time only two will be leaving aboard and it will be a nice navigation bunk.
The bunk is again 1500x2000mm,very big. Just behind the BH of the galley will be the wet cabinet.


Navigation table

This is the space for the navigation table 90x75cm.
The working position will be standing, as this is what I personally prefer when consulting charts.
Tere will also be a removable seat for those who prefer.


You can also see the access to the storage room 55x 150cm, not bad.

Galley


This is the framework to sustain the galley with the auxiliary tank underneath.


The space available for the galley is 220cm.
So quite long. Form left to right we will have a 90 liters refrigerator/freezer, two 40x40 sinks, the three fireplaces stove, a cabinet and a place for the garbage.
We plan to make the top in Corian.


Again a view of the Deck Saloon


Dinette


We changed significantly the project of Dix regarding the deck saloon.
We wanted the galley to be at the same level of the dinette. We thought, from previuos experience, that it is very unconfortable to have to climb steps from the cooking area to the dining table. And in summer, when eating in the cockpit, two set of stairs. Further there is a problem for the person cooking without a vision of outside, and finally the ventilation becomes more easy.
We have two hatches, two cowl vents, two front side windows and two center lateral window that we can open.

The second problem in the original drawing was the difficult access to the port aft cabin used as storage.
By shortening the seating of 90 cm we gained space for the navigation table aft of the dinette and an easy access to the storage, while maintaining the seating for six.


This is the port auxiliary tank under the seating. A lot, a lot of storage space will be available down there.
Before starting to work atthe joinery I was worried about storage space. Now I am worried that it is too much and that it might exceed the boat loading capacity!


This is the BH separating the seating from the navigation table. You can also see the access to the storage.


And this is a global view of the space.


From outside it really feels good!


MasterCabin


The floor framework continued frome the head compartment to the master cabin.
I used 50x30x5 angles. This way the 50mm side will be the base for the 20mm verticals of cabinetry and leave 30mm for the floor panels that will be entirely removable.
I mean that there will not be a floor with openings, rather the entire floor wil be a removable panel leaving complete access to underlying strucures.


Here are the templates of the floor panel in place.


The master cabin will have two full height wardrobes


The bed is 1500x2000mm so it is a full size rectangular bed. The head side is for 50cm under the seat of the dinette, but the ceiling there will be more than 70cm (depending on mattress tipe). 
We are going to use a normal structure for sustaining the mattres that will be tiltable to access underneath. Just like at home.
So no problem of rigidity, humidity, condensation and so on.


In front of the bed will be two amchairs, here you see the base structure.


And this is a simple sketch of how it will be finished


On both sides there will be hanging cabinets for the entire length of the cabin.
On the right of the door giving access to the head will be the Dickinson stove.
We like the radiant heat and the idea of seeing the flame burning. A more cozy sensation.


Saturday, February 16, 2013

Head AKA Bathroom

This is a crucial compartment for wellbeing onboard.
It should be big enough to take a shower confortably, but not too big to be useless in navigation.
Always a lot of constraints, toilet facing forward or backward not transversally, level of the floor for discharge, black and grey water tanks.....

So at the end we settled for a Lavac toilet, a 60 liters black water tank with the lavac going directly to the tank. In such a way we can decide when to discharge at sea or when to hold it. A deck opening will allow emptying from the quay.

A lot of thinking was on making or not a sea chest. At the end I choose not to have one. The reason is that the advantage of a concentrated sea water inlet is counterbalanced by the extralength of the pipes. As long pipes with stagnant sea water are always a problem I decided to have the water intake as close as possible to the point of use. So there will be three: one for the toilet, one for the engine and one for the galley and watermaker. The outlets will be two, one for black and grey water and one for galley and watermaker.
So a compromise as always.
By the way the sea chest, as reported by people that have it, is a good cage for growing crabs!


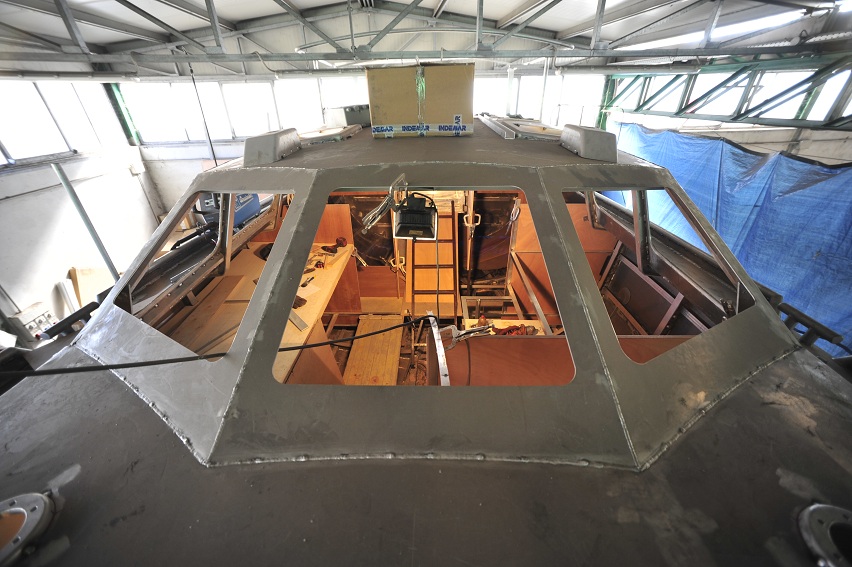
 Step number one: the Bulkheads

Here you can see the one separating the head compartment from the sail locker


After placing it I started framing the floor supports. The longitudinals are for the SB and PO cabinets. As a principle I decided that the cabinetry will be parallel to the centerline and not follow the curves of the hull. This is a more modern approach compared to the classic one. I know that probably it will not be always possible but I will try.

The transversal frames define the shower pan and the raised level for the Lavac toilet


We then cut the plywood from the templates


We continued with the differen BH and placed them


Now it starts looking good! On the right you see the template for the sink cabinet. The top will be in Corian.


Now it is the time of the black water tank


On the left of the tank will be a cabinet with a seat for the shower


And this is the final version. The openings for the cabinets left, below and above the sink will be done in the shop.Over the sink will be a mirror with a small space behind and the fast gas water heater form Rennai (only 13cm  thickness).


Joinery

Few moths ago I had already done a mock up of my interior design with hardboard.

Now it was time to go serious.
The general principle that I applied to the entire project is that anything that goes in should be able to come out. Nothing is built in and fixed. This should allow easier maintenance, more I would say it would make maintnance possible without destroying any metal or wood portion of the boat. It is my style to always have a contingency plan for the worst possible situations.

Boat plan


In my plan I have a sail locker just behind the BH.
The access to this is through the head compartment that has a wide hatch.
Coming aft is the master cabin with a regular size bed 150x200 cm and two little armchairs, plus all the cabinets.
In the deck saloon on the SB side the galley followed by the wet locker and the SB aft cabin.
On the PO side the dinette followed by the navigation table and the aft cabin used as storage.

So we have a big master cabin with a regular size head. It is a boat for 2+2.

So I proceeded to cut all the bulkheads in teak 21mm plywood.
The second step was to cut all the verticals of all the cabinets.
At this point the floor can be cut.

When I will have finished this phase all the wood will be removed, and after finishing the final interior welding (like supports for the genoa track etc) we will spray the foam.
The plan is to finish the cabinets in the carpentry shop while finishing the aluminium.